GitHub Pages for Non-Rubyists
Recently I wanted to clean up the online resources for Python Crash Course. I’d been using a number of markdown files in the project’s repository, but for someone new to GitHub there’s a lot of visual clutter on a page like this. After setting up GitHub Pages, that page is much cleaner. I had never written a line of Ruby code in my life before doing this, so I learned a fair bit in the process.
Many online resources walk you through the process of setting up GitHub Pages for a project, but most of these assume your system is already set up for working on Ruby projects. This guide assumes you have no background with Ruby.
Building the Main Page
Let’s start out with a simple project, with a README.md file in the root directory. If you’d like to follow along, I made a simple project called Hello Worlds. It has a few Hello World programs in different languages, each in a separate directory. The project has a README.md file in the root directory, and one in each language’s directory as well. To work with this project, fork it and make a clone on your system. I’m starting out with a fresh installation of Ubuntu 14.04, so I’ll need to install git before cloning the repository:
$ sudo apt-get install git
$ git clone https://github.com/username/hello_worlds.git
Note that you should be cloning your own fork of hello_worlds, not my repository. This way you’ll be able to push your own version of GitHub pages for the project. The home page for Hello Worlds looks like a typical project page on GitHub:
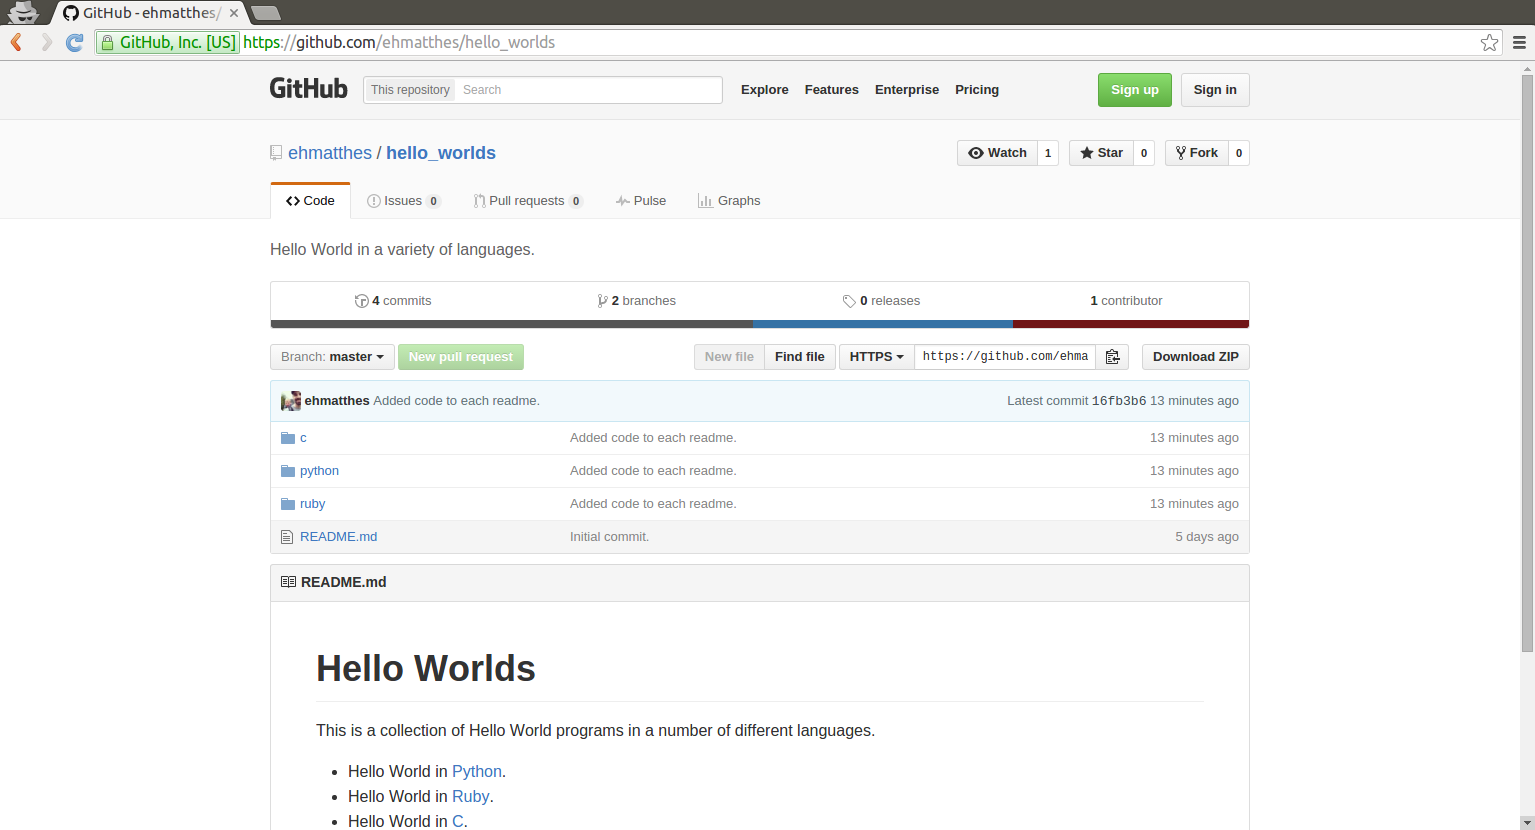
Now let’s use GitHub’s page generator to make a cleaner home page for the project. Go to the repository’s page on GitHub, and click the Settings tab. Scroll down to the GitHub Pages section and click the Launch automatic page generator button. You can change the project name and tagline if you don’t like what’s automatically generated. Since our project already has a README.md file, click the Load README.md button. Then click Continue to Layouts. Choose a theme, and click Publish page. Now you can see your project’s clean home page at http://username.github.io/hello_worlds/.
The resulting page is much cleaner:
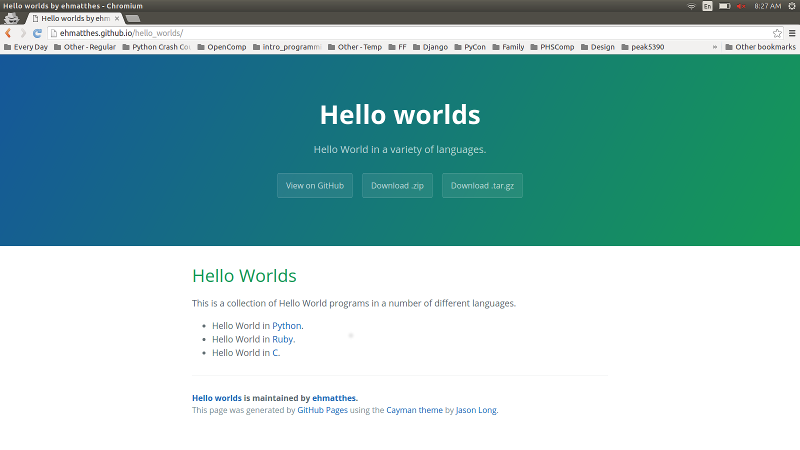
If your project only needs a single page, you’re finished. Any time you update your project’s README, repeat these steps and you’ll have an updated project page as well. But many projects benefit from additional pages, so let’s add a few pages using a template.
Setting up a GitHub Pages development environment
When we used GitHub’s page generator, a new branch called gh-pages was created in our project’s repository. Let’s fetch this branch, and work with it locally:
hello_worlds$ git fetch origin gh-pages
hello_worlds$ git checkout gh-pages
hello_worlds$ ls
index.html  params.json  stylesheets
GitHub’s page generator has converted the README.md file to an HTML file called index.html. It’s also created a params.json file, and a set of stylesheets as well. You can build additional pages by writing HTML manually, but that’s pretty inefficient. Let’s set up Jekyll so we can create additional pages by simply writing markdown files.
Installing Ruby
GitHub Pages requires Ruby 2.1.7 or higher, and the standard Ruby in the 14.04 archives is Ruby 1.9. We’ll use rbenv to install a more recent version of Ruby. This will also set Ruby up in a way that makes it easy to develop other Ruby projects at some point.
We need to install several libraries:
$ sudo apt-get install -y zlib1g-dev libssl-dev libreadline-dev
If you’re typing these commands by hand, note there’s a one before the g in zlib1g-dev, not the letter l. Now we’ll set up rbenv and ruby-build:
$ git clone https://github.com/rbenv/rbenv.git ~/.rbenv
$ echo 'export PATH="$HOME/.rbenv/bin:$PATH"' >> ~/.bashrc
$ echo 'eval "$(rbenv init -)"' >> ~/.bashrc
$ git clone https://github.com/rbenv/ruby-build.git ~/.rbenv/plugins/ruby-build
Open a new terminal window, so these changes take effect. Now you can see the versions of Ruby that are available for installation:
$ rbenv install -l
The latest stable version at the time of this writing is 2.3.0. I like to see that the installer is making progress, so I include the -v flag when using the rbenv install command. The final command rbenv global 2.3.0 tells your system to use version 2.3.0 if no other version of Ruby is specified for a particular project:
$ rbenv install -v 2.3.0
$ rbenv global 2.3.0
Now we can install bundler, which installs and manages Ruby gems efficiently. Note that you don’t need sudo when installing gems with this approach.
$ gem install bundler
Now create a file called Gemfile in the project’s root directory, while on the gh-pages branch:
hello_worlds$ git status
On branch gh-pages
hello_worlds$ touch Gemfile
Add these two lines to Gemfile:
source 'https://rubygems.org'
gem 'github-pages'
Now run the following two commands in the project’s root directory. This will install the github-pages gem and a bunch of required libraries. The second command will build a local version of our GitHub Pages site:
hello_worlds$ bundle install
hello_worlds$ bundle exec jekyll build --safe
Now we can start the Jekyll server, and see our pages locally:
hello_worlds$ bundle exec jekyll serve
You can see your site at http://localhost:4000/.
Ignoring the _site/ directory
Let’s see what Jekyll built for us:
hello_worlds$ ls
Gemfile  Gemfile.lock  index.html  params.json  _site  stylesheets
There’s a new directory called _site/. This is an auto-generated directory which contains the resources needed to serve a static site. We don’t want to commit this, so let’s make a .gitignore file and add _site/ to it:
hello_worlds$ touch .gitignore
hello_worlds$ echo "_site/" >> .gitignore
Let’s commit the changes we’ve made so far:
hello_worlds$ git status
On branch gh-pages
hello_worlds$ git add .
hello_worlds$ git commit -am "Added .gitignore, set up github-pages."
Building additional pages
With Jekyll serving our pages locally, we can build out the rest of the pages and then push them live. To match our project’s directory structure we’ll make three directories. Let’s start with the python directory:
hello_worlds$ mkdir python
Let’s copy the python/README.md file into this directory. You can do this by checking out the file from the master branch, while in the gh-pages branch.
hello_worlds$ git checkout master python/README.md
If you’ve stopped the Jekyll server, start it again with the command bundle exec jekyll serve. You can visit the python README file at http://localhost:4000/python/README.md. You’ll just see the raw markdown file in the browser:
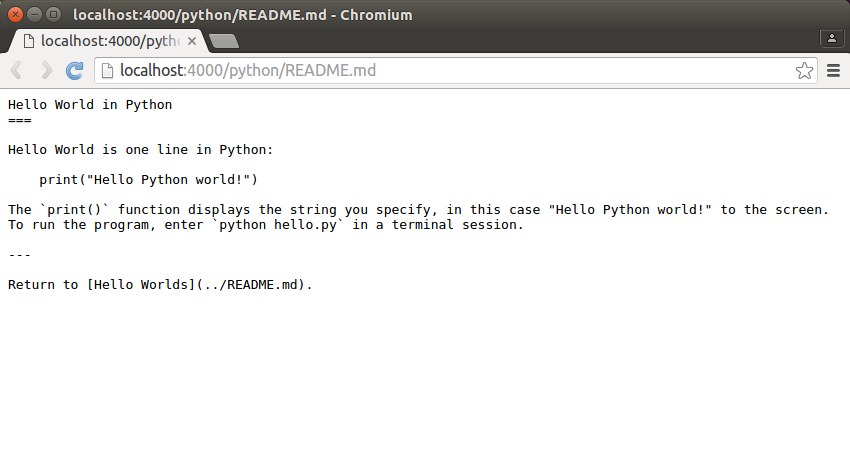
Now we’ll modify python/README.md slightly so Jekyll processes the file and serves it as an HTML page. Add two lines of triple dashes at the top of python/README.md:
---
---
Hello World in Python
===
Now visit http://localhost:4000/python/README.html. The triple dash header tells Jekyll to process the markdown file and render it as an HTML page.
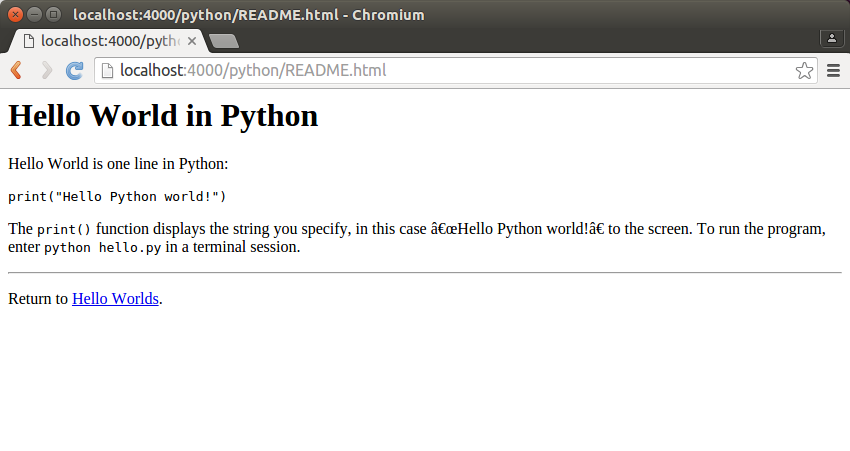
Some characters may not render properly, but they’ll display properly by the time we’re finished styling the page.
Using a layout
We’d like to apply the same theme to all of our pages. We can do this using layouts. Make a _layouts directory. Then copy the index file to the _layouts directory, with the name default.html:
hello_worlds$ mkdir _layouts
hello_worlds$ cp index.html _layouts/default.html
Now let’s look at default.html. We need to keep the parts that should be on all pages, and define variables for the sections that will change from page to page:
1
2
3
4
5
6
7
8
9
10
11
12
13
14
15
16
17
18
19
20
21
22
23
24
25
26
27
28
29
30
31
32
33
34
35
36
37
38
39
40
41
42
43
<!DOCTYPE html>
<html lang="en-us">
<head>
<meta charset="UTF-8">
<title>Hello worlds by ehmatthes</title>
<meta name="viewport" content="width=device-width, initial-scale=1">
<link rel="stylesheet" type="text/css" href="stylesheets/normalize.css" media="screen">
<link href='https://fonts.googleapis.com/css?family=Open+Sans:400,700' rel='stylesheet' type='text/css'>
<link rel="stylesheet" type="text/css" href="stylesheets/stylesheet.css" media="screen">
<link rel="stylesheet" type="text/css" href="stylesheets/github-light.css" media="screen">
</head>
<body>
<section class="page-header">
<h1 class="project-name">Hello worlds</h1>
<h2 class="project-tagline">Hello World in a variety of languages.</h2>
<a href="https://github.com/ehmatthes/hello_worlds" class="btn">View on GitHub</a>
<a href="https://github.com/ehmatthes/hello_worlds/zipball/master" class="btn">Download .zip</a>
<a href="https://github.com/ehmatthes/hello_worlds/tarball/master" class="btn">Download .tar.gz</a>
</section>
<section class="main-content">
<h1>
<a id="hello-worlds" class="anchor" href="#hello-worlds" aria-hidden="true"><span aria-hidden="true" class="octicon octicon-link"></span></a>Hello Worlds</h1>
<p>This is a collection of Hello World programs in a number of different languages.</p>
<ul>
<li>Hello World in <a href="python/README.md">Python</a>.</li>
<li>Hello World in <a href="ruby/README.md">Ruby</a>.</li>
<li>Hello World in <a href="c/README.md">C</a>.</li>
</ul>
<footer class="site-footer">
<span class="site-footer-owner"><a href="https://github.com/ehmatthes/hello_worlds">Hello worlds</a> is maintained by <a href="https://github.com/ehmatthes">ehmatthes</a>.</span>
<span class="site-footer-credits">This page was generated by <a href="https://pages.github.com">GitHub Pages</a> using the <a href="https://github.com/jasonlong/cayman-theme">Cayman theme</a> by <a href="https://twitter.com/jasonlong">Jason Long</a>.</span>
</footer>
</section>
</body>
</html>
We’ll use three variables. On lines 7, 9, and 10 the variable {{ site.baseurl }} makes sure stylesheets are accessible from any directory level. The variable {{ page.title }} on line 23 replaces the title of the page, and on line 25 {{ content }} replaces the main content on each subpage:
1
2
3
4
5
6
7
8
9
10
11
12
13
14
15
16
17
18
19
20
21
22
23
24
25
26
27
28
29
30
31
32
33
34
35
36
37
<!DOCTYPE html>
<html lang="en-us">
<head>
<meta charset="UTF-8">
<title>Hello worlds by ehmatthes</title>
<meta name="viewport" content="width=device-width, initial-scale=1">
<link rel="stylesheet" type="text/css" href="{{ site.baseurl }}/stylesheets/normalize.css" media="screen">
<link href='https://fonts.googleapis.com/css?family=Open+Sans:400,700' rel='stylesheet' type='text/css'>
<link rel="stylesheet" type="text/css" href="{{ site.baseurl }}/stylesheets/stylesheet.css" media="screen">
<link rel="stylesheet" type="text/css" href="{{ site.baseurl }}/stylesheets/github-light.css" media="screen">
</head>
<body>
<section class="page-header">
<h1 class="project-name">Hello worlds</h1>
<h2 class="project-tagline">Hello World in a variety of languages.</h2>
<a href="https://github.com/ehmatthes/hello_worlds" class="btn">View on GitHub</a>
<a href="https://github.com/ehmatthes/hello_worlds/zipball/master" class="btn">Download .zip</a>
<a href="https://github.com/ehmatthes/hello_worlds/tarball/master" class="btn">Download .tar.gz</a>
</section>
<section class="main-content">
<h1>
<a id="hello-worlds" class="anchor" href="#hello-worlds" aria-hidden="true"><span aria-hidden="true" class="octicon octicon-link"></span></a>{{ page.title }}</h1>
{{ content }}
<footer class="site-footer">
<span class="site-footer-owner"><a href="https://github.com/ehmatthes/hello_worlds">Hello worlds</a> is maintained by <a href="https://github.com/ehmatthes">ehmatthes</a>.</span>
<span class="site-footer-credits">This page was generated by <a href="https://pages.github.com">GitHub Pages</a> using the <a href="https://github.com/jasonlong/cayman-theme">Cayman theme</a> by <a href="https://twitter.com/jasonlong">Jason Long</a>.</span>
</footer>
</section>
</body>
</html>
The site.baseurl variable is an empty variable for this project, but it allows the stylesheet links to be generated properly regardless of which directory level a page is saved in. When Jekyll processes a page that uses the default layout, it will use the HTML in default.html and fill in the values of the page.title and content variables.
We need to modify python/README.md so it will be rendered with the default layout, and we need to set its page title variable:
---
layout: default
title: Hello World in Python
---

Hello World is one line in Python:

    print("Hello Python world!")

The `print()` function displays the string you specify, in this case "Hello Python world!" to the screen. To run the program, enter `python hello.py` in a terminal session.

---

Return to [Hello Worlds](../README.md).
When writing markdown pages that Jekyll will process, we set the values for any page variables in the front matter between the first two sets of triple dashes. Here we set the layout to default and the title to Hello World in Python. Jekyll will insert this value whereever {{ page.title }} appears in the default.html layout. Anything that follows the second triple dash will be inserted wherever {{ page.content }} appears in the default layout.
We should also make a _config.yml file. This is where we can define site-wide variables such as site.baseurl:
hello_worlds$ touch _config.yml
hello_worlds$ echo "baseurl:" >> _config.yml
There’s no value for baseurl, but it’s still good to have an explicit _config.yml file so we’re not wondering if it got deleted when we look at this project at a later time.
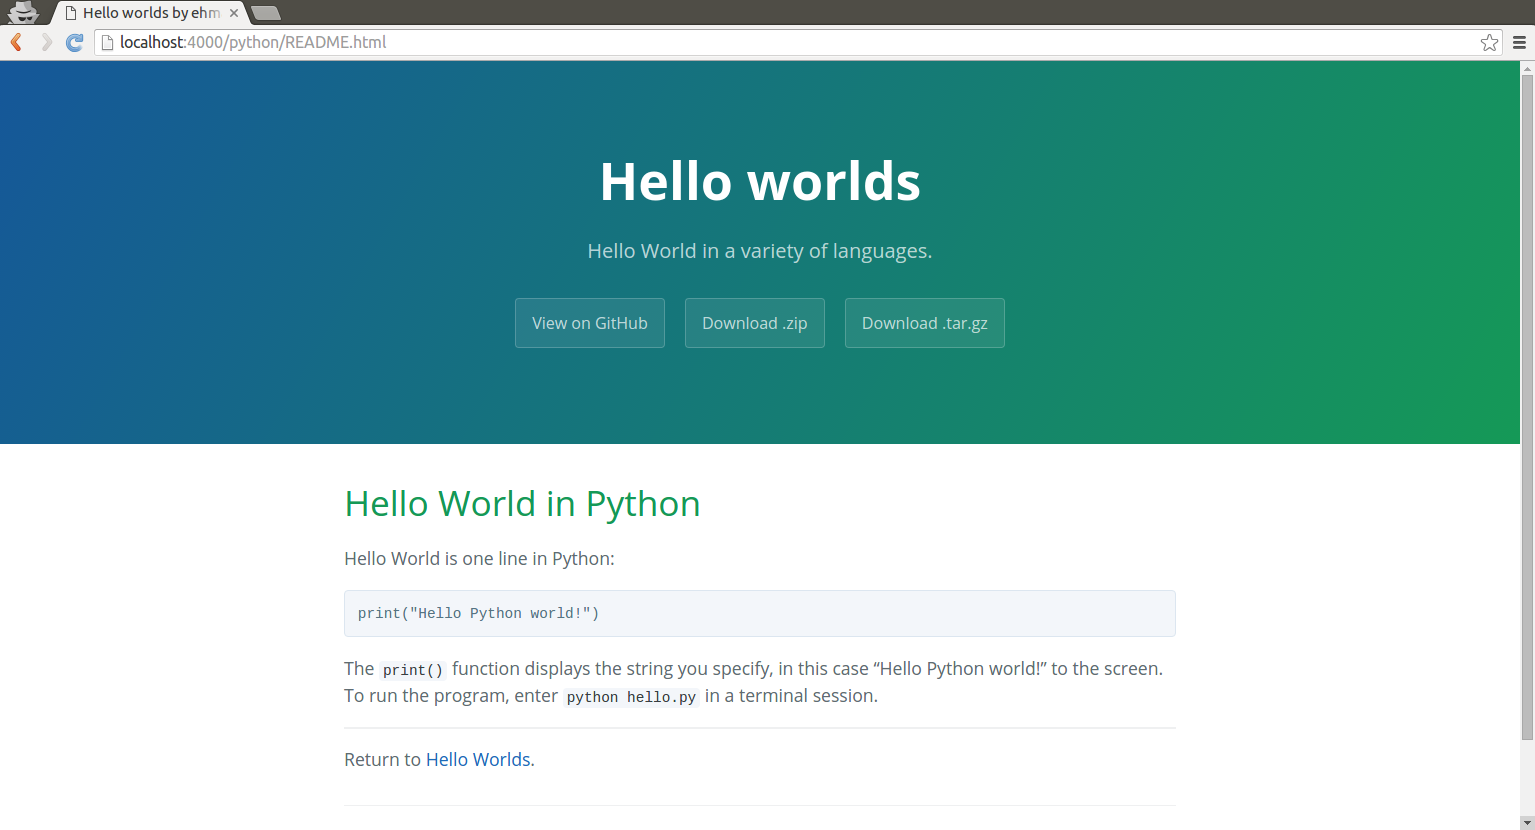
Now when we look at localhost:4000/python/README.html in the browser it uses the same theme as the index page:
Let’s commit these changes:
hello_worlds$ git status
On branch gh-pages
hello_worlds$ git add .
hello_worlds$ git commit -am "Python readme uses layout theme."
Modifying links
Let’s make sure the links from the home page to the subpages work, and the links back to the home page work. In index.html we have a link to the python/README.md page:
<li>Hello World in <a href="python/README.md">Python</a>.</li>
The page that’s actually served is python/README.html, so all we need to do is change .md to .html. Let’s correct the other two links while we’re at it:
<ul>
<li>Hello World in <a href="python/README.html">Python</a>.</li>
<li>Hello World in <a href="ruby/README.html">Ruby</a>.</li>
<li>Hello World in <a href="c/README.html">C</a>.</li>
</ul>
In python/README.md we have the following:
Return to [Hello Worlds](../README.md).
The home page is called index.html now instead of README.md:
Return to [Hello Worlds](../index.html).
Refresh localhost:4000/python/README.html, and you should be able to click back and forth between the home page and the Python page.
Modifying the theme for subpages
Before we add the Ruby and C pages, let’s modify the theme slightly for the subpages. A large header looks reasonable on a project’s home page, but it’s distracting when used on every page in a site. Let’s remove the download buttons, shrink the vertical size of the header, and turn the project title into a link back to the home page.
Make the following changes in default.html:
1
2
3
4
5
6
7
8
9
10
11
12
13
14
15
16
17
18
19
20
21
22
23
24
25
26
27
28
29
30
31
32
33
34
35
<!DOCTYPE html>
<html lang="en-us">
<head>
<meta charset="UTF-8">
<title>Hello worlds by ehmatthes</title>
<meta name="viewport" content="width=device-width, initial-scale=1">
<link rel="stylesheet" type="text/css" href="{{ site.baseurl }}/stylesheets/normalize.css" media="screen">
<link href='https://fonts.googleapis.com/css?family=Open+Sans:400,700' rel='stylesheet' type='text/css'>
<link rel="stylesheet" type="text/css" href="{{ site.baseurl }}/stylesheets/stylesheet.css" media="screen">
<link rel="stylesheet" type="text/css" href="{{ site.baseurl }}/stylesheets/github-light.css" media="screen">
<link rel="stylesheet" type="text/css" href="{{ site.baseurl }}/stylesheets/my_styles.css">
</head>
<body>
<section class="page-header page-header-subpages">
<h1 class="project-name"><a href="{{ site.baseurl }}/index.html" class="link-no-style">Hello worlds</a></h1>
<h2 class="project-tagline">Hello World in a variety of languages.</h2>
</section>
<section class="main-content">
<h1>
<a id="hello-worlds" class="anchor" href="#hello-worlds" aria-hidden="true"><span aria-hidden="true" class="octicon octicon-link"></span></a>{{ page.title }}</h1>
{{ content }}
<footer class="site-footer">
<span class="site-footer-owner"><a href="https://github.com/ehmatthes/hello_worlds">Hello worlds</a> is maintained by <a href="https://github.com/ehmatthes">ehmatthes</a>.</span>
<span class="site-footer-credits">This page was generated by <a href="https://pages.github.com">GitHub Pages</a> using the <a href="https://github.com/jasonlong/cayman-theme">Cayman theme</a> by <a href="https://twitter.com/jasonlong">Jason Long</a>.</span>
</footer>
</section>
</body>
</html>
On line 11 we link to a new stylesheet, my_styles.css. This is listed after the automatically generated stylesheets so we can override some aspects of the theme we adopted from GitHub. In the page-header section (line 15) we make “Hello Worlds” a link back to the home page; the use of the site.baseurl variable means this link will work from any directory level. We don’t want the typical link style applied to the project title, so we add a class called link-no-style to the anchor tag. We also add a new selector page-header-subpages to the section, so we can override some of the header styles on subpages (line 14).
Let’s make the my_styles.css file:
hello_worlds$ touch stylesheets/my_styles.css
Here’s what goes in my_styles.css:
a.link-no-style {
  color: inherit;
}


@media screen and (min-width: 64em) {
  .page-header-subpages {
    padding: 0.5rem 0.6rem; } }

@media screen and (min-width: 42em) and (max-width: 64em) {
  .page-header-subpages {
    padding: 0.3rem 0.4rem; } }

@media screen and (max-width: 42em) {
  .page-header-subpages {
    padding: 0.2rem 0.1rem; } }
The first selector causes links to keep their original color instead of taking on the standard blue that most links have. The three page-header-subpages selectors shrink the vertical and horizontal padding by appropriate amounts on various display devices.
We no longer need a link to the home page in the body of the text, so let’s simplify python/README.md:
---
layout: default
title: Hello World in Python
---

Hello World is one line in Python:

    print("Hello Python world!")

The `print()` function displays the string you specify, in this case "Hello Python world!" to the screen. To run the program, enter `python hello.py` in a terminal session.
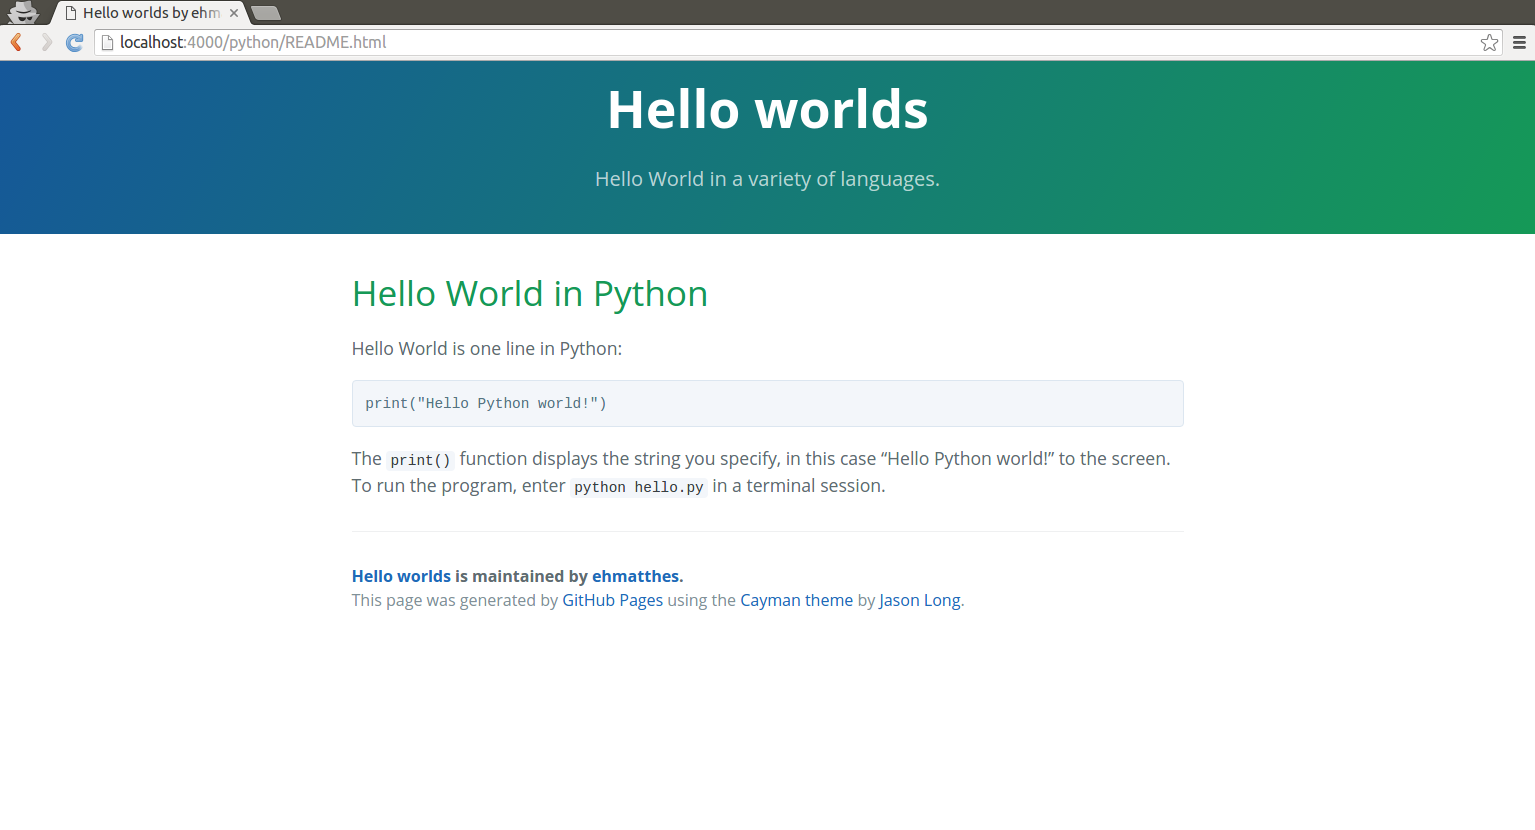
Now when you look at the home page it will look the same as it did earlier. The Python subpage will have a smaller header, allowing readers to focus more on the specific content of that page:
Adding more pages
At this point it’s fairly straightforward to add the Ruby and C pages. Let’s make directories for each of these pages, and copy the README.md files from the master branch:
hello_worlds$ mkdir ruby c
hello_worlds$ git checkout master ruby/README.md
hello_worlds$ git checkout master c/README.md
We need to add the front matter to ruby/README.md:
---
layout: default
title: Hello World in Ruby
---

Hello World is one line in Ruby:

    puts("Hello Ruby world!")

The method `puts()` displays the given string "Hello Ruby world!" to the screen and adds a newline as well. To run the program, enter `ruby hello.rb` in a terminal session.
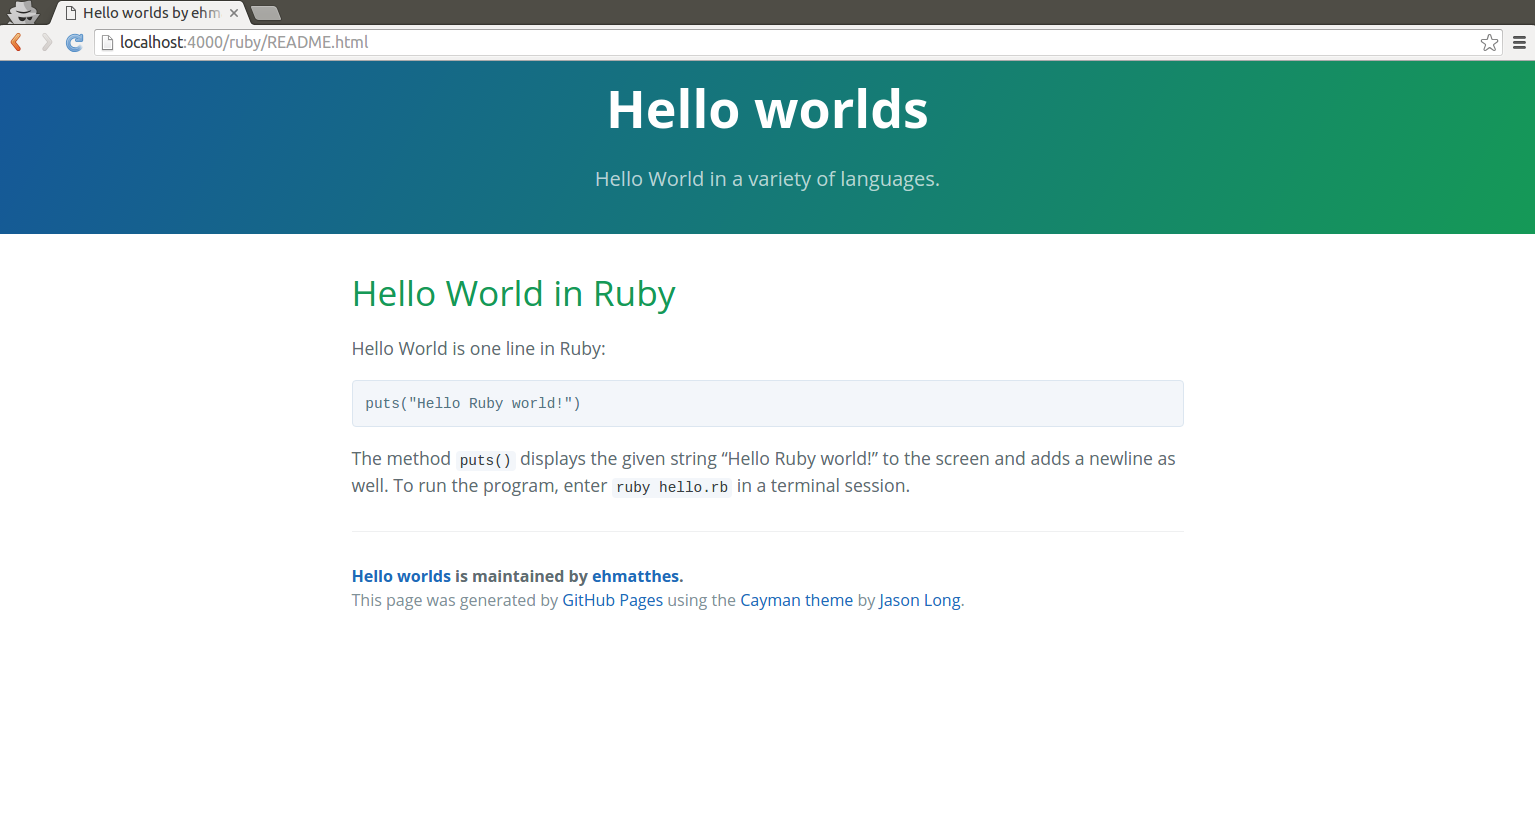
We specify the default layout and the title for this page. We remove the title we had in the body of the file, and we remove the link to the home page from the body as well. Now you can go to the home page and click on the link to Ruby, and you should see a clean page for Ruby just as we saw for Python:
The changes to c/README.md are straightforward as well.
Committing and pushing changes
To see your changes live, make a commit and push the gh-pages branch to GitHub:
hello_worlds$ git status
On branch gh-pages
hello_worlds$ git add .
hello_worlds$ git commit -am "Added Python, Ruby, and C pages."
hello_worlds$ git status
On gh-pages
hello_worlds$ git push origin gh-pages
Making new pages
To add a new page to your project’s site, create a new markdown page. Start with the front matter:
---
layout: default
title: My New Page
---
Then you can simply write markdown, and Jekyll will convert your markdown to HTML. Whenever you push the gh-pages branch, GitHub will update your live pages.
I hope you and your users enjoy your cleaner project pages!