Resources for the second edition are here. I'd love to know what you think about Python Crash Course; please consider taking a brief survey. If you'd like to know when additional resources are available, you can sign up for email notifications here.
Chapter 18
In this chapter you’ll use Django to build Learning Log, a simple web application that lets you keep track of information you’ve learned about particular topics. This section will help you get a virtual environment set up.
- Creating a Virtual Environment
- Activating the Virtual Environment
- Installing virtualenv
- Installing Django
- Updates
Creating a Virtual Environment
To work with Django, it’s best to first set up a virtual environment. A virtual environment is a place on your system where you can install packages for one project and isolate those packages from the rest of your system. Using this approach, you can have many projects on your system without worrying about one project’s packages interfering with another project’s packages. Every project can have the exact version of the packages it needs, and you can update any one project’s packages without affecting your other projects.
To get set up for Learning Log, make sure you have an empty folder somewhere on your system called learning_log.
If you’re using Python 3, you should be able to create a virtual environment with the following command:
learning_log$ python -m venv ll_env
learning_log$
This command runs the venv module and uses it to create a virtual environment named ll_env.
If this works, move on to Activating the Virtual Environment. If it didn’t work, go to Installing virtualenv.
Activating the Virtual Environment
Now that you have a virtual environment set up, you’ll need to activate it. On Linux and OS X, use the following command:
learning_log$ source ll_env/bin/activate
(ll_env)learning_log$
On Windows, run the following equivalent command:
learning_log> ll_env\Scripts\activate
(ll_env)learning_log>
This command runs the script activate, which is located in ll_env/bin. When the environment is active, you’ll see the name of the environment in parentheses. This means you can install packages to the environment and use packages that have already been installed. Packages you install in ll_env will be available only when the environment is active; if you run into errors, make sure you see (ll_env) in parentheses at the beginng of your terminal prompt. If you don’t see it, issue the activate command again.
###Deactivating the virtual environment
To stop using a virtual environment, enter deactivate:
(ll_env)learning_log$ deactivate
learning_log$
The environment will also become inactive if you close the terminal it’s running in.
Installing virtualenv
If you’re using an earlier version of Python or if your system isn’t set up to use the venv module correctly, you can install the virtualenv package. To install virtualenv, enter the following:
$ pip install --user virtualenv.
You may use pip in a slightly different manner on your system; see installing Python Packages if you need help using pip.
If you’re using Linux and this still doesn’t work, you can install virtualenv through your system’s package manager. On Ubuntu, for example, the command sudo apt-get install python-virtualenv will install virtualenv.
Creating a virtual environment with virtualenv
Change to the learning_log directory in a terminal, and create a virtual environment like this:
learning_log$ virtualenv ll_env
New python executable in ll_env/bin/python
Installing setuptools, pip...done.
learning_log$
If this works, move on to Activating the virtual environment.
If you have more than one version of Python installed on your system, you should specify the version for virtualenv to use. For example, the command virtualenv ll_env –python=python3 wil create a virtual environment that uses Python 3.
Installing Django
In an active virtual environment, you can use pip to install Django:
(ll_env)learning_log$ pip install Django
Installing collected packages: Django
Successfully installed Django
Cleaning up...
(ll_env)learning_log$
Because this command is run in a virtual environment, it’s the same on all operating systems. There’s no need to use the --user flag, and there’s no need to use longer commands like python -m pip install django.
Keep in mind that Django will only be available when the virtual environment is active.
Installing a specific version of Django
Django 2.0 introduced some changes that affect the Learning Log project. The updates described below will allow you to run the project in the latest version of Django, but you can also install the previous version if you want to match what’s in the book exactly.
To do this, specify the version of Django you want to install when you use pip:
(ll_env)learning_log$ pip install Django==1.11
Collecting Django==1.11
Installing collected packages: pytz, Django
Successfully installed Django-1.11 pytz-2017.3
This should work even if you’ve already install a different version of Django. When you ask pip to install a specific version of a library, it will uninstall any other versions first.
Updates
Django 2.0 was released recently, and there are a number of changes that affect the Learning Log project. The overall changes are described briefly, and then specific updates to the chapter are listed.
Overview
Here’s an overview of recent changes to Django:
-
Foreign keys need an explicit
on_delete=models.CASCADEargument set. This was set by default in previous versions. When a user deletes a topic in their learning log, theon_deleteargument tells Django what to do with the entries in that topic. TheCASCADEvalue tells Django to delete any entries associated with a topic that’s being deleted. -
There’s a new way to define the
namespacefor an app’s URLs. Rather than setting the namespace in the project’s urls.py file, the namespace is set in each app’s urls.py. -
There’s a simpler approach to defining URLs. In previous versions, you had to write a regular expression for any URL that included an identifier, such as http://localhost:8000/topics/1/. This new approach is not required, but you’ll probably appreciate it and want to know about it.
-
The
reverse()function has been moved fromdjango.core.urlresolversto thedjango.urlsmodule. -
Django 2.0 only works with Python 3. If you’re still using Python 2.7, you’ll need to install Django 1.11.
Checking which version of Django you’re using
The command pip freeze lists the specific versions of all packages you have installed in a virtual environment. To see which version of Django you’re using, make sure you’re in an active virtual environment, and then issue this command:
(ll_env)learning_log$ pip freeze
Django==2.0
pytz==2017.3
If you decide you’d rather use the previous version of Django so you can ignore these updates for now, you can install Django 1.11 as described above.
Specific updates
Here are the specific changes to look out for in Chapter 17. It might look like there’s a lot of changes, but once you start working through the project you’ll see that many of these changes follow a consistent pattern. If you have any trouble with this that you can’t resolve, please reach out for help (ehmatthes@gmail.com or @ehmatthes)
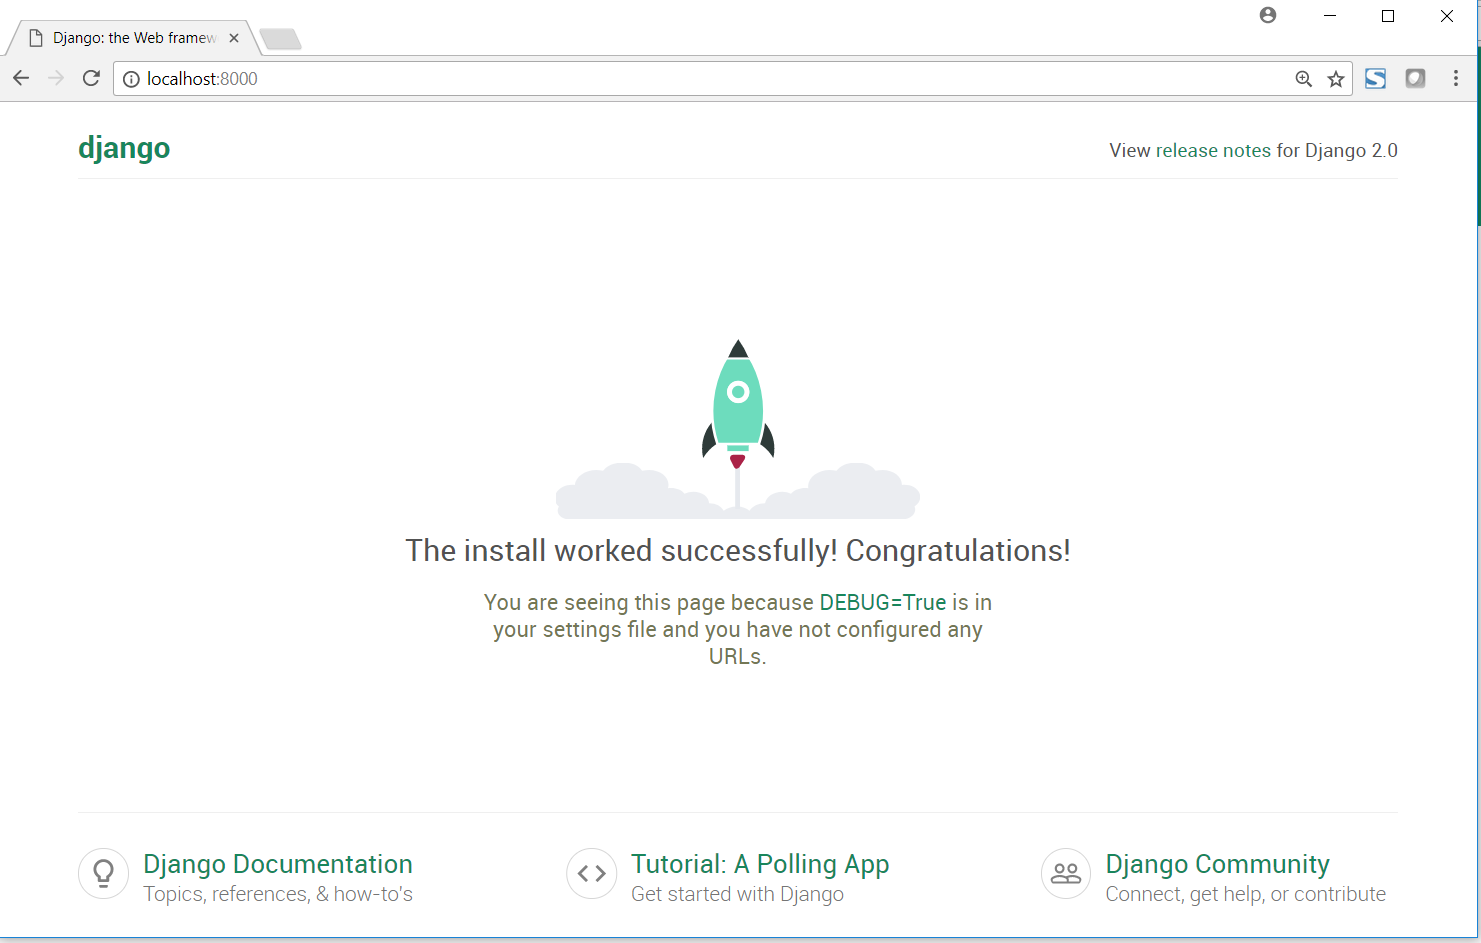
p. 402, Figure 18-1
The default home page for a new Django project has been updated, and it’s beautiful!
p. 408, Defining the Entry Model
Replace the line that reads
topic = models.ForeignKey(Topic)
with
topic = models.ForeignKey(Topic, on_delete=models.CASCADE)
This tells Django that when a topic is deleted, all of the entries associated with that topic should be deleted as well. This is known as a cascading delete.
p. 413, Mapping a URL
When you start a project in Django 2.0, this is what you’ll see in the project’s main urls.py file:
from django.contrib import admin
from django.urls import path

urlpatterns = [
    path('admin/', admin.site.urls),
]
Django 2.0 introduces a new path() function that simplifies how we define URLs. The older url() approach still works, but in these updates I’ll show you how to use the new path() function.
Here’s how to include the URLs for the learning_logs app:
from django.urls import path, include
from django.contrib import admin

urlpatterns = [
    path('admin/', admin.site.urls),
    path('', include('learning_logs.urls')),
]
The include() function is now imported from the django.urls module. Since the new URL routing approach doesn’t require regular expressions, we don’t need to include a carat at the beginning of the URL string. We also don’t need to include a namespace argument in the include() call; that will be specified in the app’s urls.py in a moment.
Here’s what the learning_logs/urls.py file should look like:
"""Defines url patterns for learning_logs."""

from django.urls import path

from . import views

app_name = 'learning_logs'
urlpatterns = [
    # Home page.
    path('', views.index, name='index'),
]
We need to import the new path() function from django.urls. In Django 2.0, the app’s namespace is defined through an app_name variable in the app’s urls.py. Finally, the URL pattern for the home page is simpler without the need to define a regular expression.
p. 419, The Topics URL Pattern
The topics URL pattern should look like this:
urlpatterns = [
    --snip--
    # Show all topics.
    path('topics/', views.topics, name='topics'),
]
p. 422, The Topic URL Pattern
The topic URL pattern should look like this:
urlpatterns = [
    --snip--
    # Detail page for a single topic.
    path('topics/<int:topic_id>/', views.topic, name='topic'),
]
In this new path()-based approach you figure out what you want the URL to look like:
http://localhost:8000/topics/5/
Then you write this as a string, with any variables in the URL inside angle brackets. In the angle brackets you describe the type of variable to expect, int in this case, and provide a name for the value in the URL. This is much simpler than writing a regular expression to capture the value in the URL.